The Timeline holds the ordered clips that make the active edit. A project can contain several timelines while sharing one My Assets media pool.
Timeline structure
Time runs left to right. The yellow playhead marks the current Viewer frame. Visual tracks are above audio tracks; clips later in time play later. Drag the ruler or playhead to navigate and use the zoom controls to change how much time is visible.
Multiple timelines
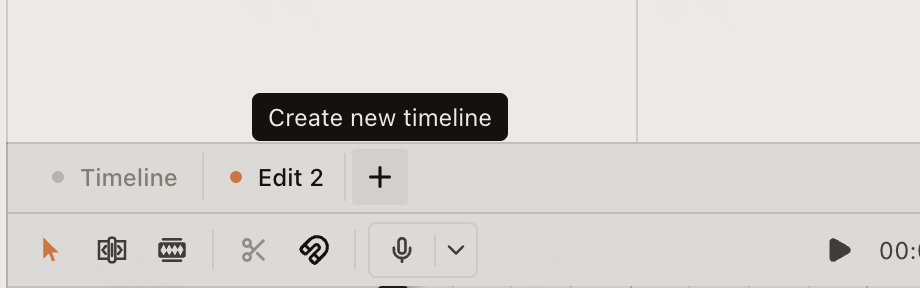
Select Create new timeline from the + or Timeline actions control above the tracks. Once two timelines are visible, select their tabs to switch and drag a tab to reorder it. Open a tab’s three-dot menu or right-click it to Duplicate, Rename, Hide, or Delete.
To restore a hidden timeline, select the tab-row +, then choose it under Hidden. Hiding keeps its clips; deleting removes the timeline and its clips. You cannot hide the last visible timeline or delete the project’s only timeline.
V1 / V2 / A1 / A2
V1, V2… are video tracks and A1, A2… are audio tracks. Higher video tracks can appear in front of lower ones. Use separate audio tracks for dialogue, music, and effects when you need independent control.
Track-header controls and context menus
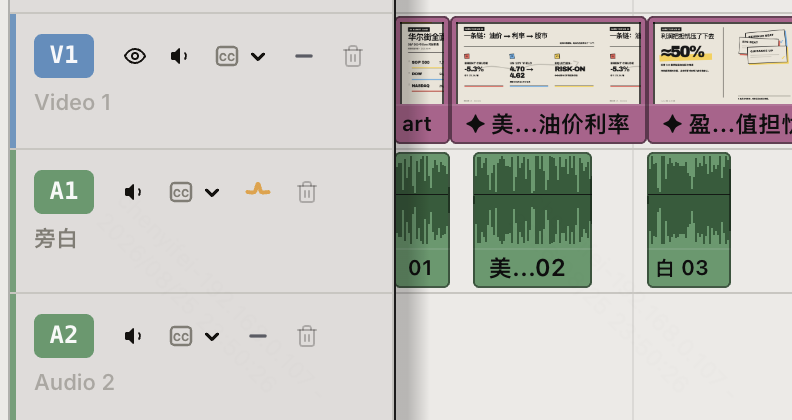
Use the eye control to show or hide a video track and the speaker control to hear or mute audio. Lock a track before selecting or moving content that must stay in place.
Right-click a track header to open its menu:
- Rename changes the label shown in the track header.
- Record voiceover opens the reviewed voiceover recorder for that audio track.
- Track controls lets you show or hide the header controls for Visibility, Volume, Lock, Audio ducking, Captions, and Effect lane. Reset to default restores the default set of controls.
- Delete track removes the track and its clips. Review the confirmation before continuing.
For automatic audio ducking, expose the Audio ducking control, then click its track-header icon to cycle through: anchor (this priority track makes followers quieter), follower (this track lowers under anchors), and off (ignored by ducking). A typical setup uses dialogue as the anchor and music as the follower.
Expose Effect lane when you need to see and edit effects that cover a range of the track instead of one clip.
Selection, Trim, and Blade modes
The three mode buttons above the Timeline change what a pointer gesture does. Hover each button to see its active shortcut; shortcuts can vary with the current preset.
- Selection Mode: select and move clips, and trim an edge without automatically rippling later clips.
- Trim Edit Mode: trim the main content-spine clip and ripple the time change through following clips. Trimming a clip on another track resizes only that clip.
- Blade Edit Mode: click a clip at the intended frame to split it. Return to Selection Mode before moving the new pieces.
Move, trim, split, and duplicate
- Drag a clip to move it in time or to a compatible track.
- Drag either edge to trim its visible range.
- Put the playhead on a selected clip and choose Split or press C.
- Select a clip and use Duplicate or the current duplicate shortcut to make another instance.
- Use Undo immediately if a ripple edit moves more content than intended.
Right-click a clip for additional operations. Available commands depend on the selected type:
- Find in Media Pool reveals the source in My Assets.
- Paste Effects applies copied effects to the selected compatible clips.
- Speed offers common playback rates. Enable Ripple following clips in the submenu when the duration change should move later content.
- Detach Audio creates separate audio clips from selected video clips. Detaching removes audio crossfades on those clips; the confirmation explains this before applying the change.
- Apply Effect, Apply LUT, and Reset Effects / Reset Clip LUT manage compatible looks without opening Library first.
Right-click an empty Timeline area for Paste, Select all, Zoom to fit, Reset track height, and Remove empty tracks when those actions are available.
Speed, effects, and transitions
Right-click a clip and choose Speed to switch between common playback rates. Add effects from Library to a compatible clip. Put a transition on a cut between adjacent visual clips; separating or deleting either side can remove it.
At a cut, the Timeline context menu can add a video cross dissolve, an audio cross fade, or both when the neighboring clips have enough spare source media. A through-edit marker means both sides came from the same continuous source; choose Delete Through Edit on that seam to join them back into one clip.
Add and edit markers
- Put the playhead at the frame you want to mark.
- Use the Add marker shortcut shown under Avatar → Keyboard shortcuts → Markers. Use Add marker and open dialog when you want to enter a note immediately.
- Click an existing marker on the ruler to open Edit note. Drag the marker to move it, or use the marker shortcuts to modify, delete, or jump to the previous or next marker.
Markers are edit notes and navigation points; they do not split clips or change the export range.
Synchronize multiple cameras or recorders
Use AI multicam sync when two or more recordings cover the same take and contain overlapping, recognizable audio.
From My Assets:
- Select at least two video clips with audio, audio clips, or a mix of both. Command/Ctrl-click adds individual cards; Shift-click selects a range.
- Right-click one of the selected cards and choose AI multicam sync.
- ChatCut places the usable clips at the current playhead on separate Timeline tracks, then shows Preparing AI multicam sync and a progress percentage while it aligns them.
From an existing Timeline, select at least two audio or video clips, make sure their playback speed is 1×, right-click the selection, and choose AI multicam sync. ChatCut moves the clips into alignment without cutting between camera angles. Play through a clear clap or spoken phrase and inspect the waveforms to review the result.
If ChatCut cannot find a confident audio match, it leaves the selection unsynchronized. It also applies no change when alignment would make clips overlap on the same track. Move those clips to separate tracks and retry.
Isolate spoken voice
AI Voice Isolation suppresses non-voice sound around spoken human voice. It is intended for dialogue, interviews, and voiceover—not music, ambience, or sound effects.
- Select one or more video or audio clips that contain speech.
- Right-click and choose AI Voice Isolation.
- Wait for Isolating voice… to finish.
- To undo the treatment, right-click and choose Restore original audio.
The picture and original source asset are not changed; playback and export use a cleaned audio derivative for that Timeline item. If a later trim extends beyond the processed range, ChatCut may temporarily use original audio and show a warning. Apply Voice Isolation again to cover the new range.
In / Out range
Press I to mark In, O to mark Out, and X to clear the range. The marked zone can be chosen as the export range in the Export panel. It does not delete or trim content outside the zone.
See My Assets / Media Pool, Library, and Export Panel.