The Record control is in the Timeline playback controls. Select its chevron to choose a recording type, microphone, camera, and whether to use the three-second countdown. Recording itself does not use credits.
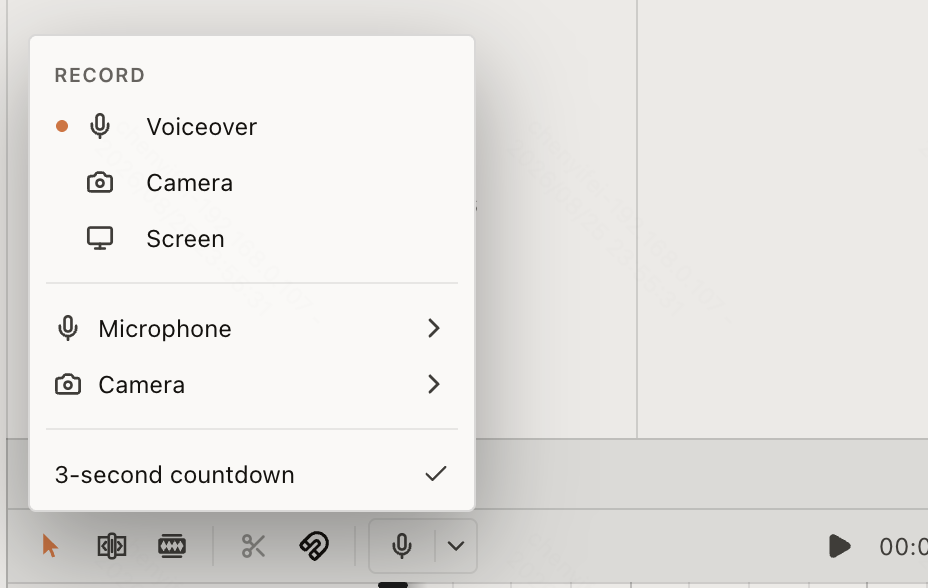
What do the three recording modes do?
Open Recording settings from the chevron on the Record control, then choose a mode under Record:
- Voiceover: switch the left Record button to a microphone. Select that button to start capturing your microphone.
- Camera: switch the left Record button to a camera. The first click opens a camera-and-microphone preview; confirm the frame, then click again to start recording.
- Screen: switch the left Record button to screen capture. Select that button to open the system screen or window picker; recording starts after you choose a source.
ChatCut remembers the last selected mode. You cannot switch modes during a take.
Start and stop a recording
- Move the playhead to where the recording should begin.
- Choose a mode in Recording settings. In the same menu, choose a Microphone or Camera, or turn 3-second countdown on or off when needed.
- Select the left side of the Record control to start. ChatCut pauses Timeline playback when capture begins.
- Select the control again when it reads Stop recording. For screen capture, the system’s stop-sharing control ends the take as well.
After you stop, ChatCut saves the recording to My Assets and places it at the playhead position where capture began. Voiceovers go to an audio track; camera and screen recordings go to a video track. If the target track has no room, ChatCut uses another available track or creates one when needed.
Web and Desktop permissions
Web and Desktop use the same recording controls and sequence. On the web, the browser asks for microphone, camera, or screen-sharing permission. On Desktop, the desktop app and operating system handle that permission. The permission surface can differ, but denying access cancels the take.
If capture is interrupted, reopening the project can show Found an unsaved camera recording… Recover? or Found an unsaved voiceover… Recover?. Select Recover to add the found recording back to the project. Do not clear browser or Desktop application data before recovery.
See My Assets, Editor Layout, and Timeline.