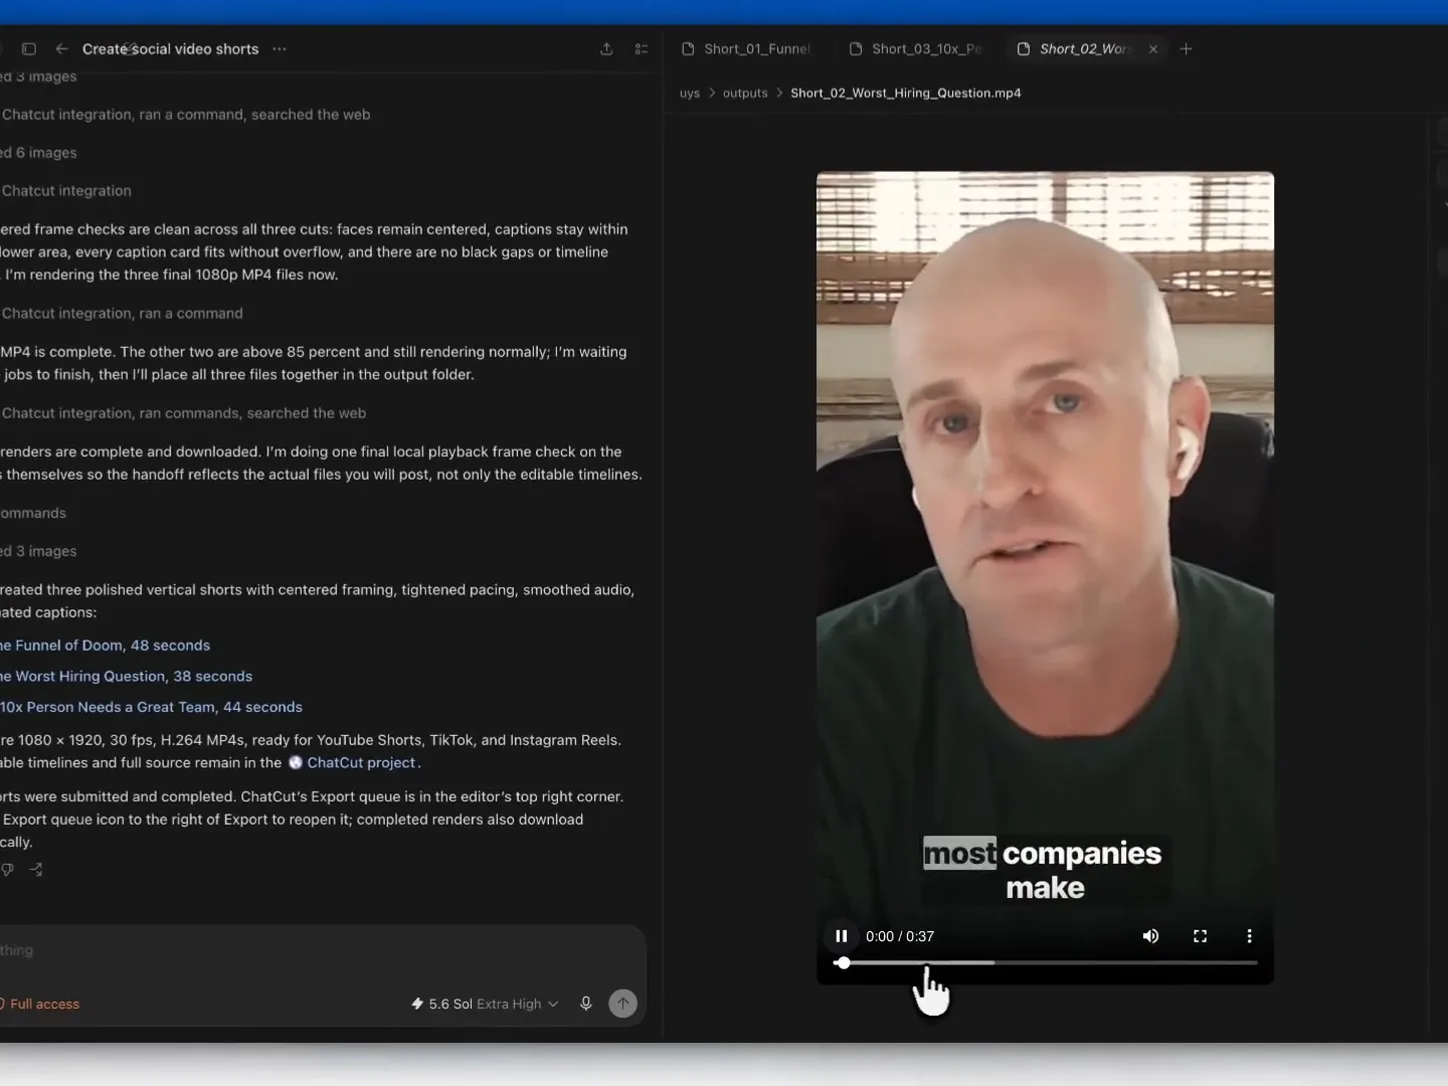
Yes. ChatGPT can edit video when it is connected to a video-editing plugin such as ChatCut. ChatGPT interprets your instructions, while ChatCut applies the cuts, captions, B-roll, Motion Graphics, and audio on an editable timeline. Without a connected editor, ChatGPT can plan an edit but cannot modify or export the video project.
This tutorial takes you from plugin installation to a finished talking-head edit, with prompts you can adapt for other formats. If you would rather see the result before the method, we tested this workflow on a real project and published what came out of it.
Quick start: edit a video in five steps
- Install the ChatCut plugin. In the ChatGPT/Codex desktop app, search for ChatCut in the plugin store and click Install. You can also install it by pasting the setup prompt from the ChatCut plugin for ChatGPT into a task.
- Add your footage. Attach the source to the task, or upload it to My Assets in the ChatCut editor, and say what you want to make.
- Ask for a rough cut. Define what to remove, what must stay, the target length, and the intended audience.
- Add the finishing layers. Request captions, B-roll, Motion Graphics, music, voiceover, sound effects, or generated media only where they support the story.
- Review and export. Play the editable timeline, correct details in ChatGPT or directly in ChatCut, then export the finished file.
The most useful prompt is a clear editor brief: source, audience, deliverable, required moments, and constraints.
What you need before you start
- A supported ChatGPT/Codex desktop task. The installation prompt cannot install the plugin from the ChatGPT website, an isolated remote workspace, or the ChatCut web editor.
- A ChatCut account. The installer opens a browser authorization page so you can sign in and allow the connection.
- Medium reasoning effort. Medium is enough to start and finish most editing tasks without unnecessary waiting. Raise it later for a complex multi-timeline job.
- Source footage you have permission to use. Clear dialogue helps when the edit depends on a transcript. You can also bring audio, images, logos, and other project media.
- A defined output. Name the audience, target platform, orientation, approximate length, and purpose of the video.
- Optional visual references. Brand colors, fonts, logo files, caption references, or a saved Design Style can make the first pass more consistent.
Give ChatGPT enough direction to produce a useful draft, then refine one issue at a time.
A-Roll and B-Roll: the two stages of every edit
Two terms explain why the steps below are ordered the way they are.
A-Roll is the spine of the video: the footage that carries the story, usually the person speaking. B-Roll is everything layered on top to make that story clear and complete: a cutaway shot, a screen recording, a photograph, a chart, a Motion Graphic.
Almost any edit reduces to the same two stages. First get the A-Roll to say what it needs to say, in the right order, at the right length. Then add B-Roll where the spoken line alone is not enough.
This matters when you are directing an agent. Asking for cuts, captions, graphics, music, and generated footage in one prompt produces a draft where you cannot tell which decision went wrong. Finish the A-Roll first, confirm it plays, and only then start adding.
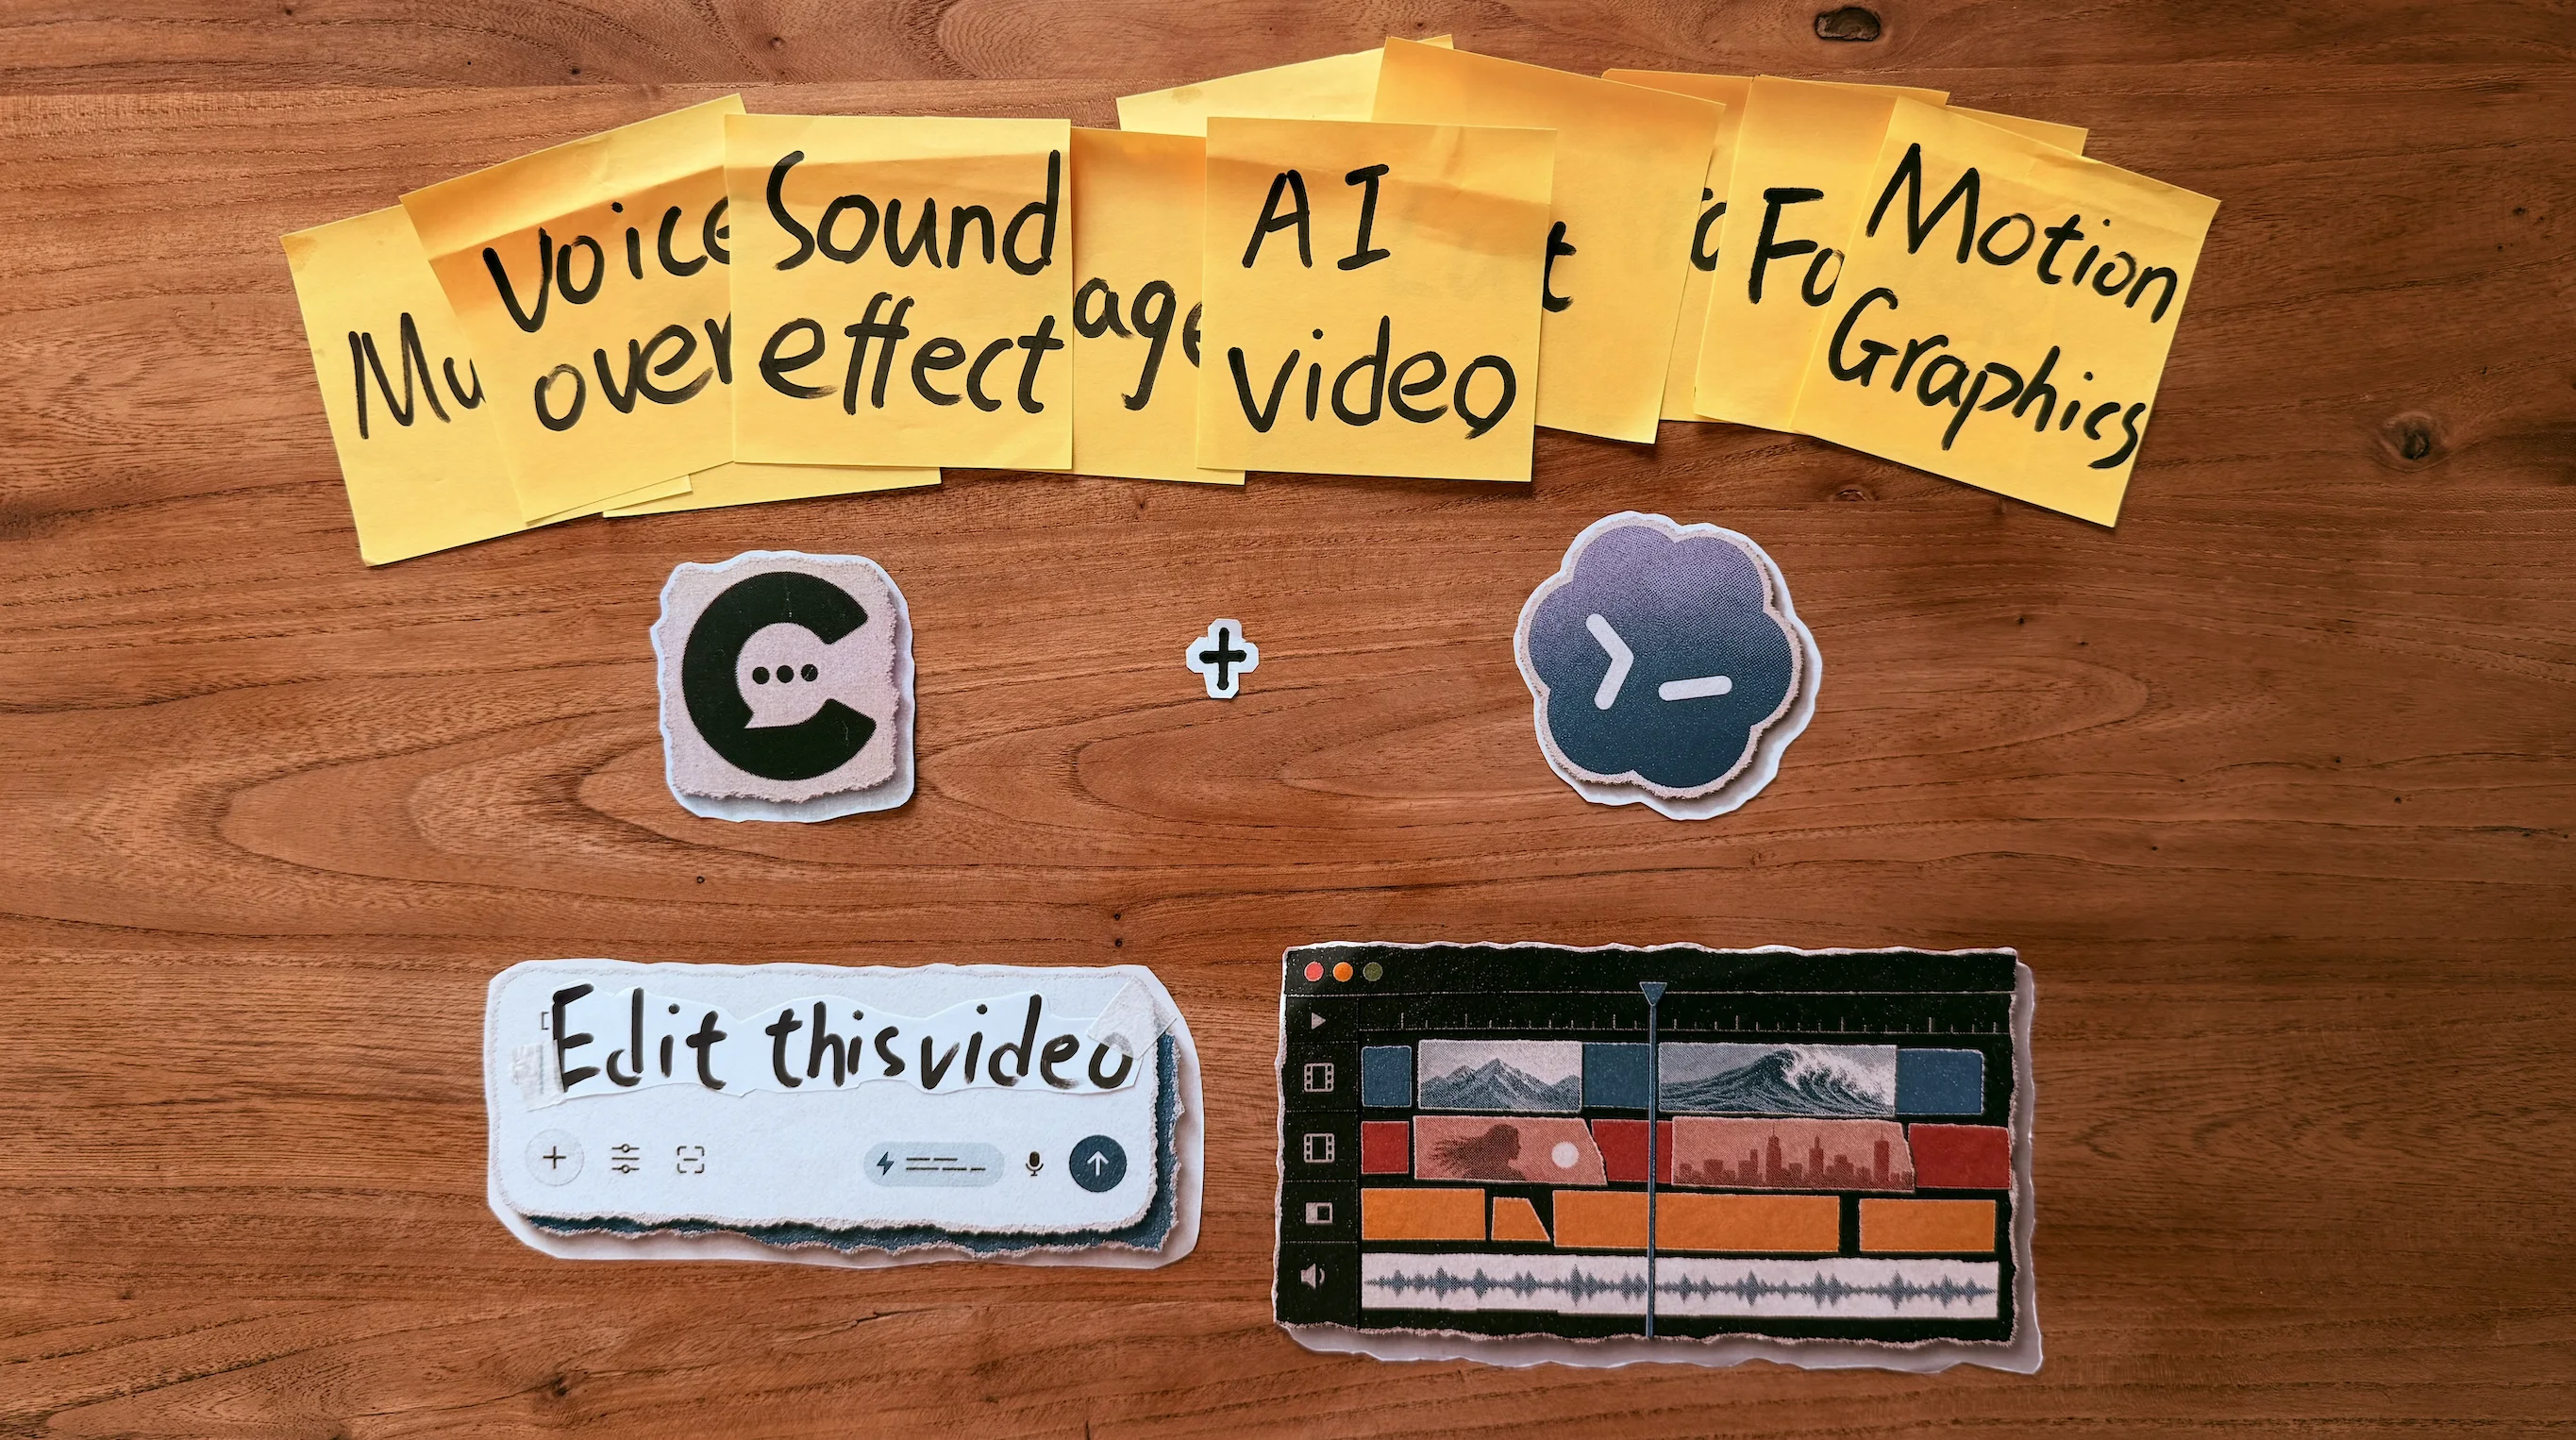
How to edit video with ChatGPT using ChatCut
Steps 1 to 5 build the A-Roll. Steps 6 to 9 add the B-Roll and deliver the file.
1. Install ChatCut in the desktop app
There are two ways to install ChatCut, and both finish in the same place: a desktop task with ChatCut’s editing tools available. Use the plugin store if you want the shorter route, or the setup prompt if you would rather not leave the conversation.
Option A: install from the plugin store. Open the plugin store in the ChatGPT/Codex desktop app, search for ChatCut, and click Install. Nothing needs to be typed, and the listing is the same one you will see for any other plugin.
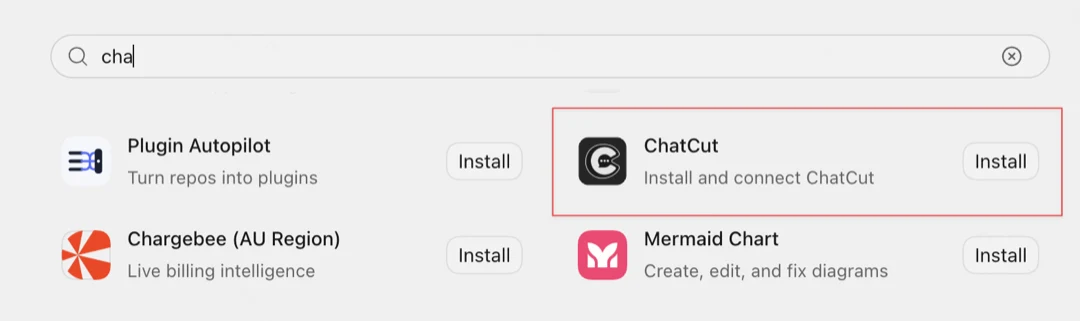
Option B: install with a prompt. Start a new task in the desktop app and paste this:
/goal Read chatcut.io/chatgpt to install the ChatCut plugin and set up a new task for me.Either way, complete the sign-in flow when the authorization page opens. Installation and authorization happen where you started, but plugin tools are loaded only when a task begins, so the edit itself has to happen in a task opened afterwards. If you used the prompt, follow the installer into the completely new task it creates rather than continuing in the installation task.
If no new task opens for you, start one yourself and type @chatcut to wake the plugin. That is also how you bring ChatCut back for your next edit, once an earlier task is finished.
When ChatCut opens in the Browser panel beside the conversation, the connection is ready.
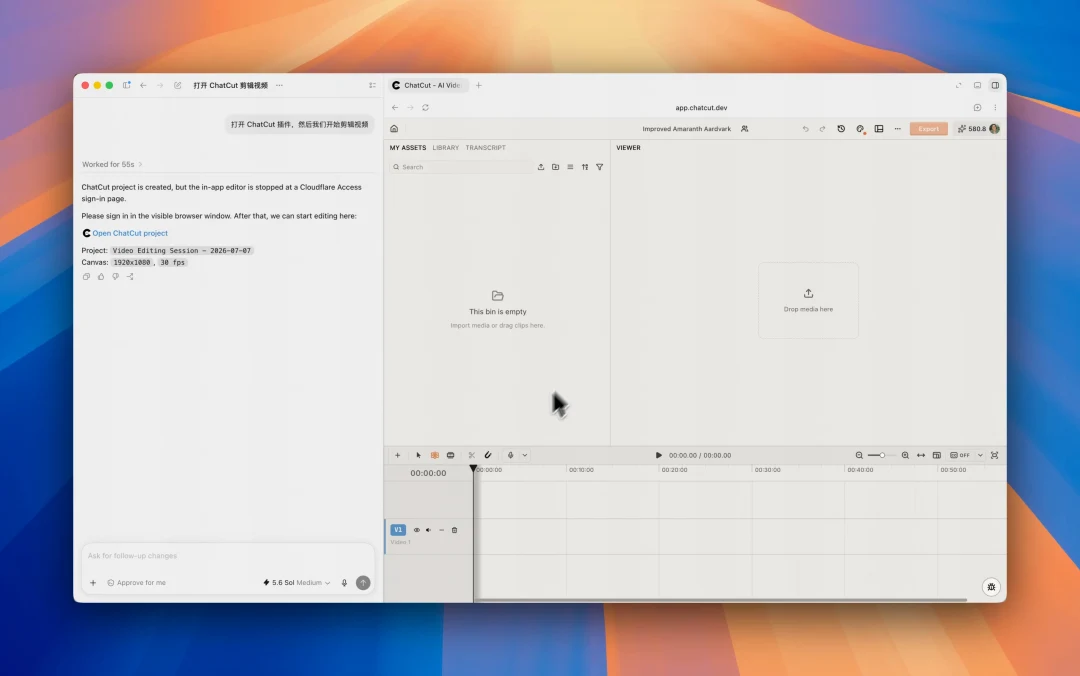
2. Upload the footage and give ChatGPT a brief
Attach a video to the task and explicitly ask ChatGPT to import it into the ChatCut project. Alternatively, open My Assets → Upload in ChatCut and add the project media there. A message attachment gives the agent context; it does not automatically place that file on the timeline.
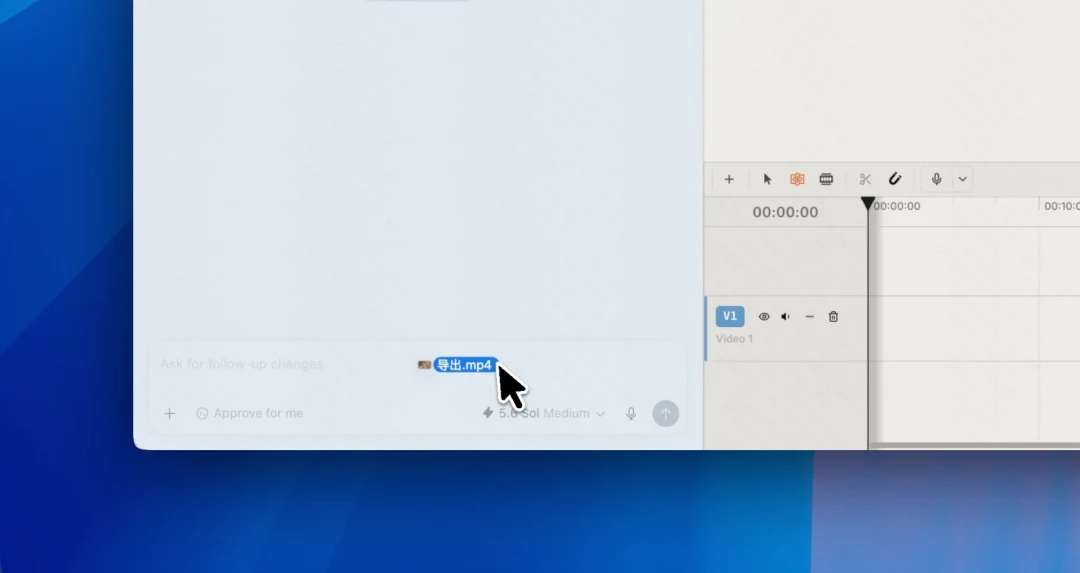
A useful brief answers five questions:
- What source files or takes should ChatGPT use?
- Who is the audience?
- Where will the video be published?
- What must stay, and what may go?
- What is the intended viewer outcome?
For example: “Turn this 12-minute product walkthrough into a concise YouTube tutorial for first-time users. Keep the setup and final result, remove repeated explanations and dead air, and do not add generated footage.”
3. Create the rough cut
Make the A-Roll work before adding any visual polish. Ask ChatGPT to remove verbal clutter while protecting the speaker’s meaning and natural cadence.
Remove repeated takes, filler words, obvious restarts, and unnecessary pauses. Keep the meaning intact, preserve any pause that helps the point land, and make the delivery feel natural.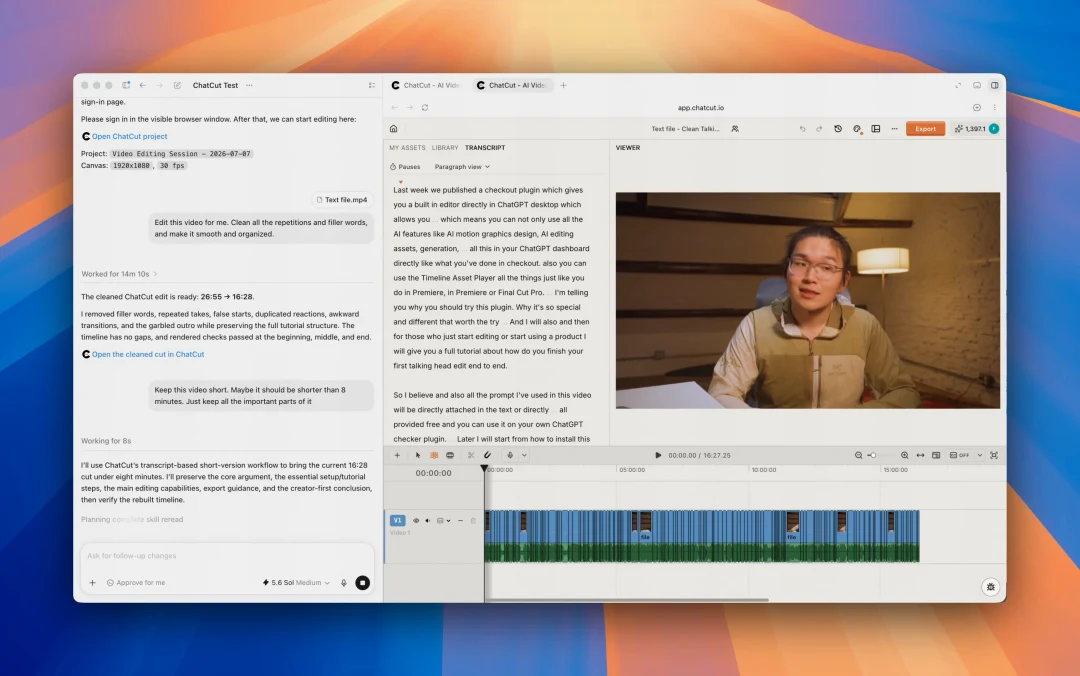
Open the transcript panel while this runs. It is worth it for two reasons: you get the whole script’s structure at a glance, which is the fastest way to remember what you actually recorded, and you can watch each removal disappear from the text as the edit is applied, so you can tell immediately whether the agent understood the instruction.
The text-based editing workflow maps spoken words to the corresponding timeline ranges. Read for missing context, then listen across every cut. A clean transcript can still hide a clipped word or awkward visual jump.
4. Add and style captions
Once the spoken edit is stable, add captions. Specify full sentences or word-level emphasis, plus the intended style.
Add word-level captions and highlight the word currently being spoken. Keep the text readable on a phone, away from the speaker's face, and consistent throughout the video.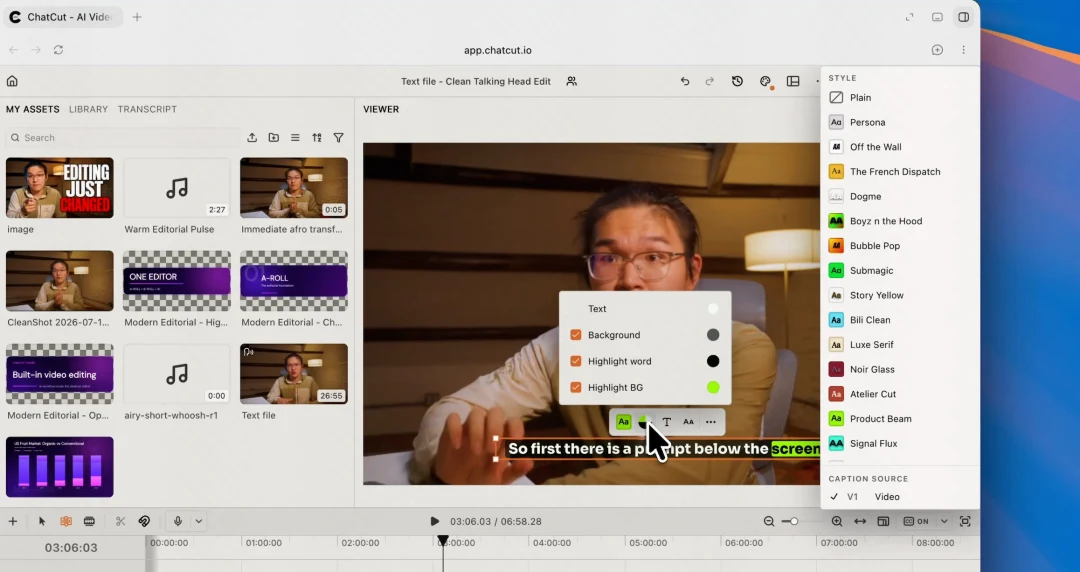
Built-in caption presets are the fastest route. If none of them is what you want, upload a screenshot of a caption style you like and ask ChatCut to reproduce it, or set the type, color, and position by hand in the editor. The AI captions guide covers generation and styling. Always check proper nouns, product terms, numbers, and line breaks.
5. Finish the A-Roll with sound, transitions, and zooms
Sound effects, transitions, and punch-in zooms are the cheapest way to connect ideas and mark emphasis, and they belong to the spoken edit rather than to the B-Roll pass.
Add subtle sound effects, transitions, and punch-in zooms only where they connect ideas or emphasize an important line. Keep the existing cut unchanged and avoid an effect on every sentence.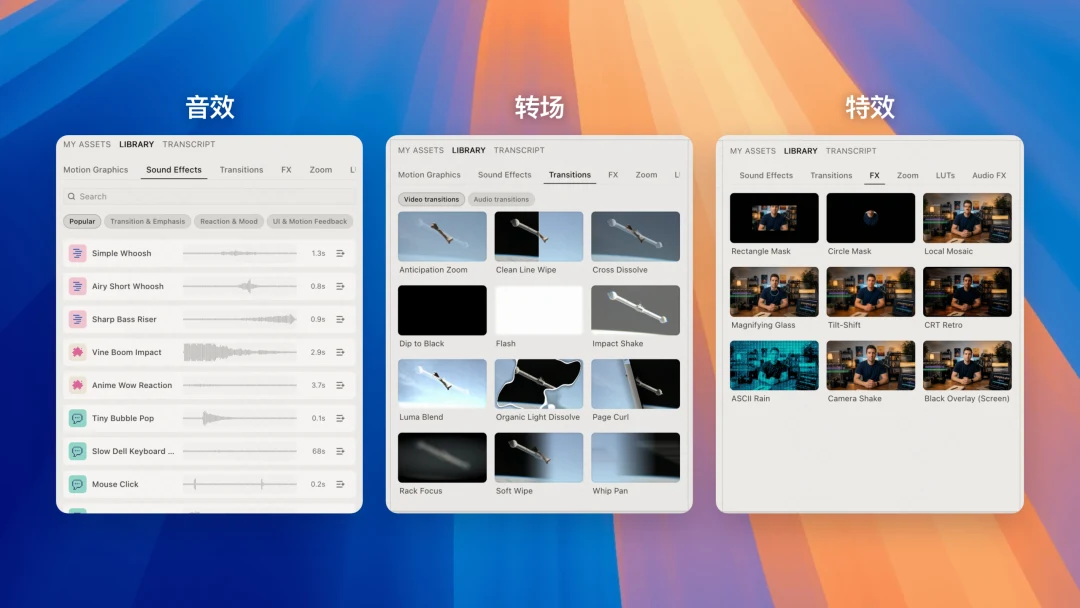
You are not limited to what the agent chooses. ChatCut ships a sound-effect library and a transition library, and you can drag any item straight onto the timeline yourself.
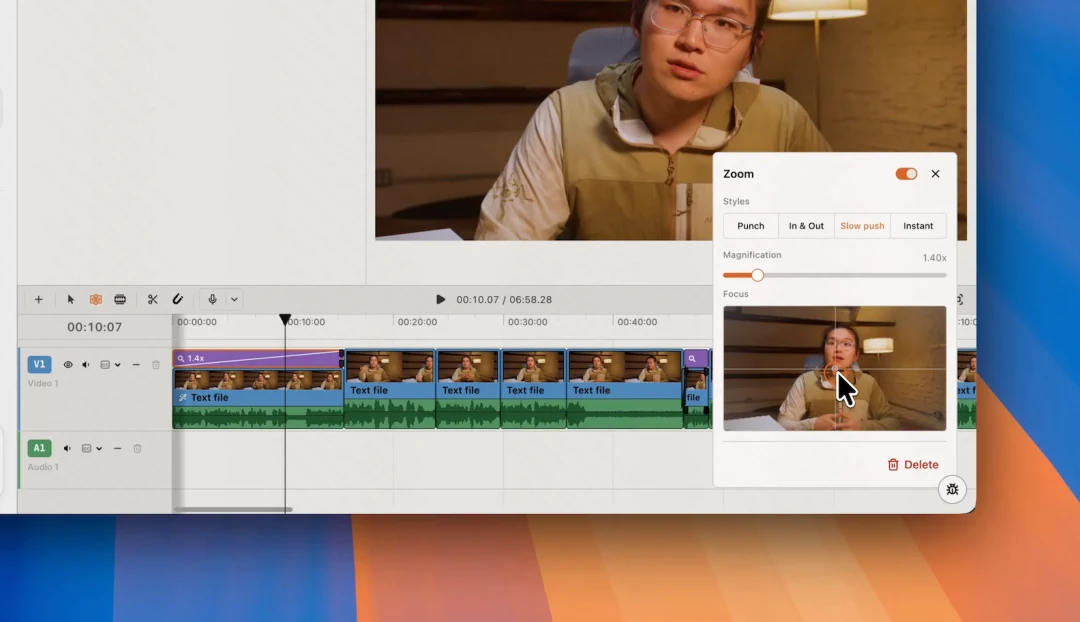
Zooms work the same way: ask for them in the conversation, or add one on the timeline and open its editor to set the framing, the timing, and the easing. If you have ever set keyframes in a conventional editor, this will feel like a much shorter version of the same job.
That completes the A-Roll. The spine of the video now says what it needs to say. Everything from here adds to it.
6. Add Motion Graphics
For a talking-head video, Motion Graphics are the cleanest form of B-Roll: they carry meaning instead of merely filling the frame. Four moments are usually worth one:
- Laying out the structure of the whole piece near the top.
- Marking the start of each point in a numbered or sectioned argument.
- Making an abstract idea concrete when words alone are doing too much work.
- Emphasizing a single line you want the viewer to keep.
Ask for them by purpose and let the agent place them.
Add Motion Graphics where they introduce a key point, clarify the structure, or explain an abstract idea. Use one consistent visual direction and keep every graphic subordinate to the speaker.ChatCut offers a set of tuned visual directions to choose from, so a whole video shares one look instead of collecting unrelated inserts.
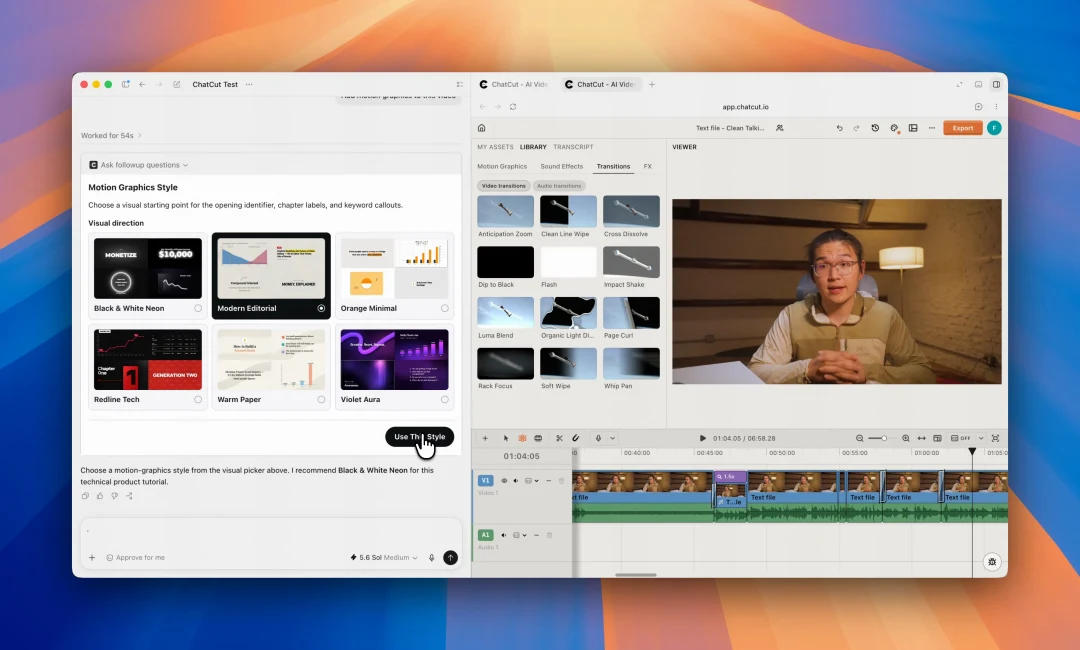
Once a direction is applied, the graphic sits over the footage as its own layer rather than being burned into the picture.
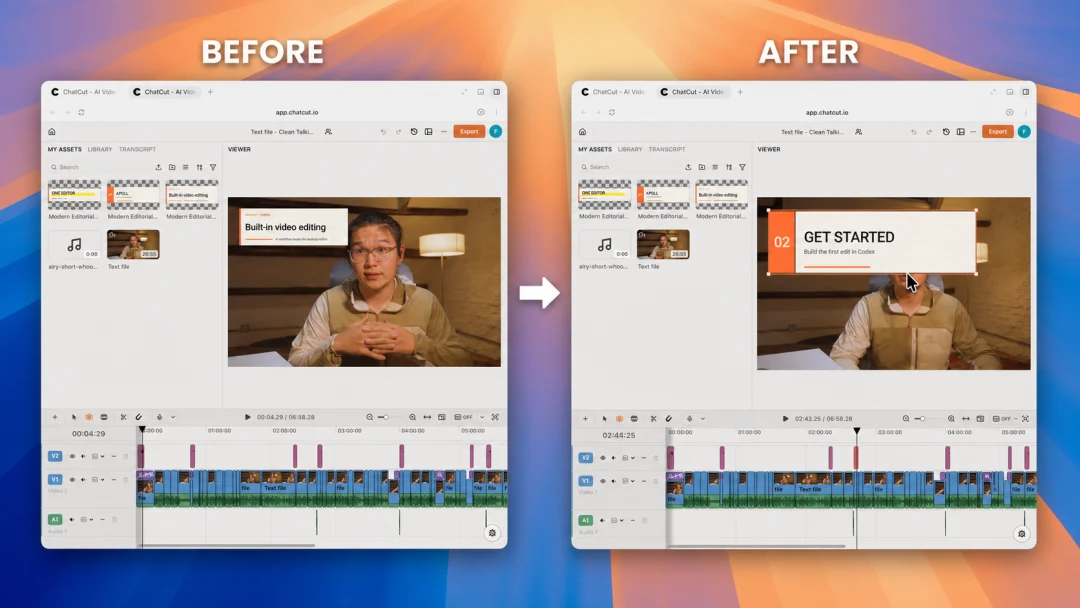
If the result is close, revise its text, colors, spacing, placement, or exposed design properties instead of regenerating the whole video. You can prompt the change, or open the Motion Graphics editor and adjust the palette and type sizes by hand.
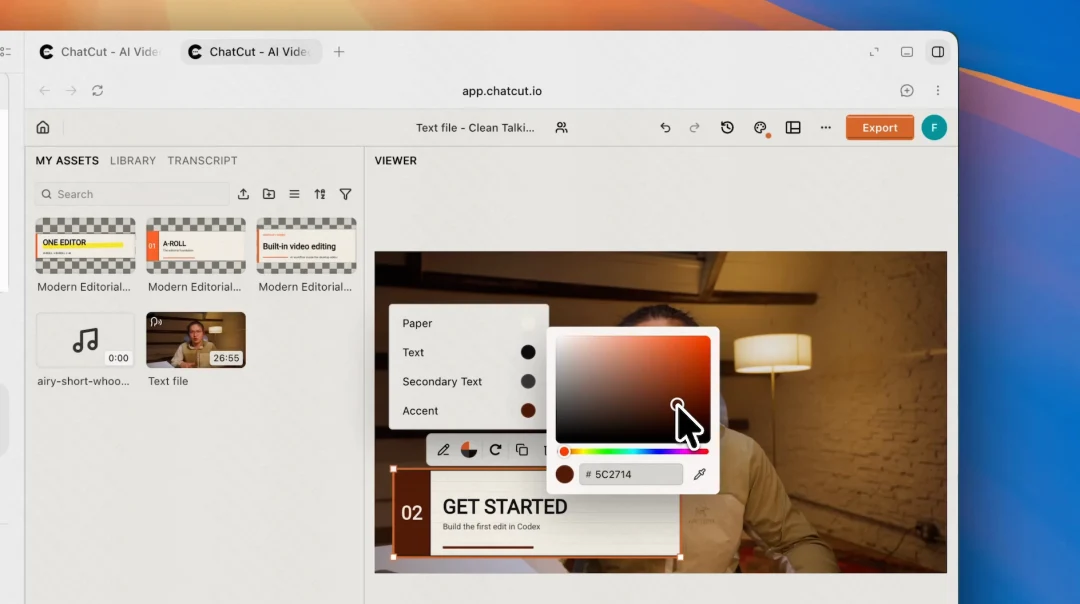
You can also start from a built-in template, place it on the timeline, and save a graphic you like for the next project. If you have settled on a full visual system, including a logo and brand fonts, save it as a Design Style and reuse it. The Motion Graphics feature guide shows the broader workflow.
7. Generate the images and video you cannot shoot
Some points need a shot you do not have and cannot license. ChatCut can generate a supporting image or video without leaving the task. Specify its purpose, reference, duration, and placement.
At 00:20, capture the current frame and use it as the starting frame. Change the speaker's hairstyle to an Afro, then create a short cutaway that fits this moment. Do not alter the surrounding edit.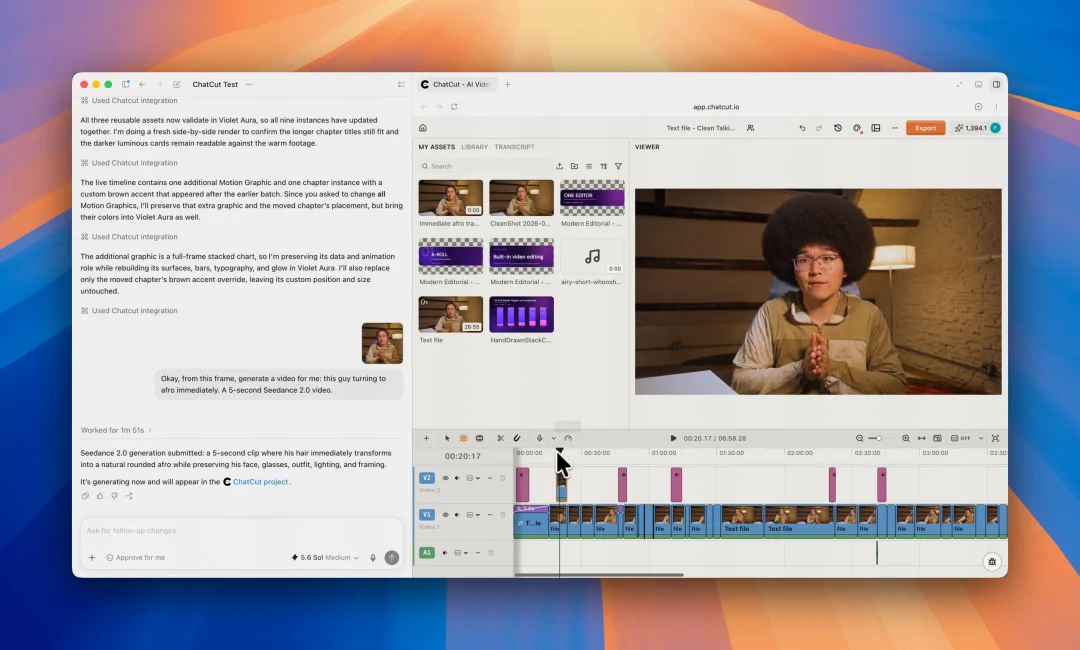
For a still image or thumbnail, define the composition and constraints as carefully as the subject.
Create a 1280 × 720 YouTube thumbnail. Place [person] in a half-body portrait on the [left/right], looking at the camera and wearing [clothing]. On the opposite side, use one short red word and the remaining headline in white, with no more than five words total. Use a real bookshelf, home office, or studio as the background and soften it slightly. Keep strong foreground contrast. Do not add watermarks or play buttons.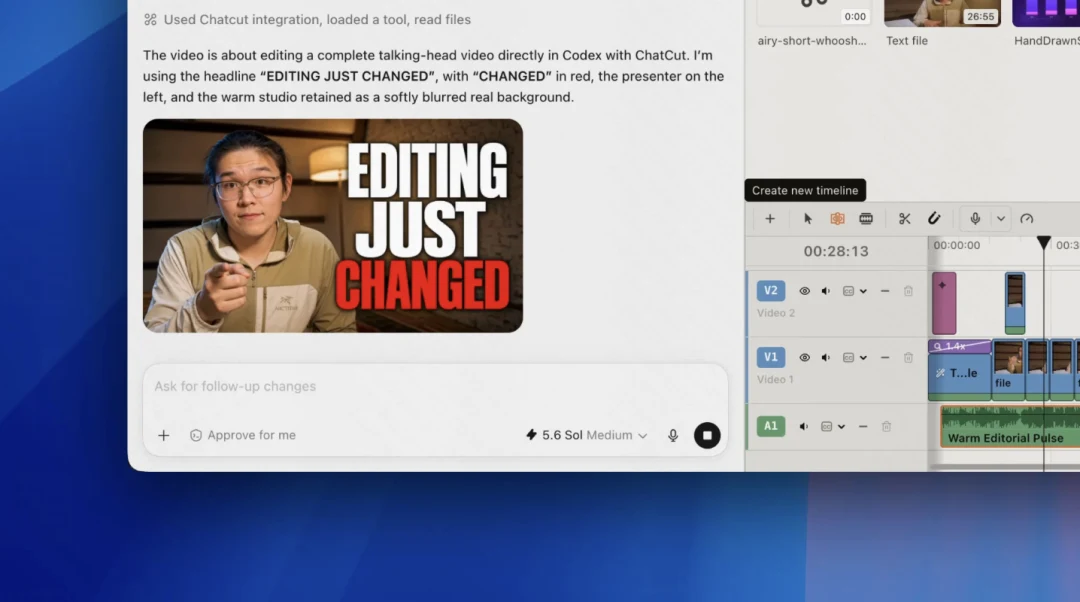
Two different meters can apply here. When Codex uses its own image generation, that runs on your ChatGPT/Codex allowance and does not create a ChatCut charge. Generation performed by ChatCut is billed in credits by model, resolution, and length, and the editor shows an estimate before the job starts; the credits policy lists the current rates. The AI video generator covers the separate job of creating new footage: editing changes source media you already have, generation creates a new asset to use within the edit.
8. Add music, voiceover, and sound effects
For music, explain the role it should play rather than asking for a generic track. Mention the pace, emotional direction, and whether speech must stay dominant.
Analyze the structure and pacing of this talking-head edit. Create a restrained music bed that supports the delivery without competing with the voice, and add it beneath the spoken track.Generated voiceover covers two useful cases: a line no one recorded, such as the other half of a conversation, and creators who would rather not appear or speak on camera at all. Generated speech is transcribed like any other clip, so you can keep refining it with the same text-based editing you used on the A-Roll.
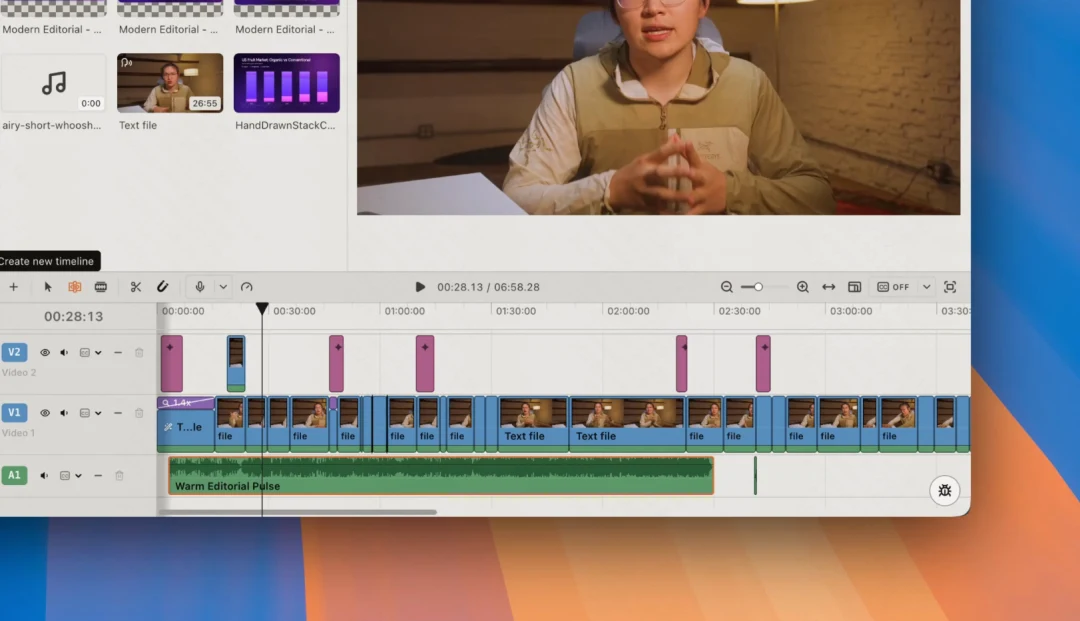
Review pronunciation, timing, and levels, and cut anything that does not earn its place.
9. Review the timeline and export
Watch the complete piece, then inspect its opening, major cuts, captions, graphic edges, audio changes, and final frame. Request specific revisions—“restore the pause after the first sentence” is better than “fix the pacing”—or edit the timeline directly.
When the result is ready, ask ChatGPT to export or open Export in ChatCut. The active timeline can be delivered as a finished video, audio, subtitles, or an XML handoff in FCP7 XMEML for Adobe Premiere Pro and DaVinci Resolve. Inside the XML export, Include motion graphics renders each graphic as a transparent ProRes 4444 file beside the timeline; that option requires Pro. Check imported timelines either way, because not every visual treatment travels through XML.
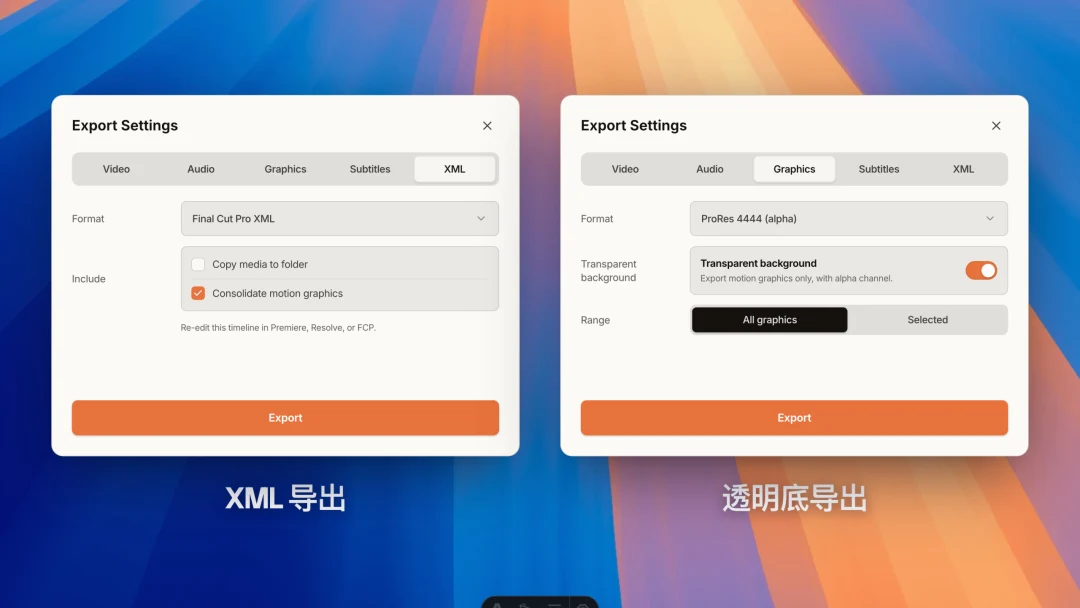
Do not treat a completed render job as the final quality check. Play the actual exported file and verify picture, audio, captions, resolution, orientation, and duration. The export guide lists what each delivery type includes.
Copyable prompts for common editing tasks
For a complete first pass, combine the outcome and constraints in one brief, then request targeted revisions. For a repeated format, turn the brief into a reusable video-editing master prompt.
Talking-head cleanup
Use ChatCut to make a clean first cut of this talking-head video for YouTube. Remove repeated takes, filler words, obvious restarts, and long empty pauses, but preserve the speaker's meaning and natural cadence. Keep the strongest opening line, add readable captions, and leave all media and edits on an editable timeline. Do not add generated footage or music yet.Long-form video to Shorts, TikTok, and Reels
Find three self-contained highlights in this interview. Turn each into a separate 9:16 short for YouTube Shorts, TikTok, and Instagram Reels. Open with the strongest complete line, preserve enough context for each idea to stand alone, keep each timeline editable, and add phone-readable captions. Do not invent quotes or cut a sentence in a way that changes its meaning.Product demo or explainer
Turn this product walkthrough into a concise explainer for first-time users. Structure it as problem, three setup steps, result, and next action. Remove waiting, repeated clicks, and failed takes. Use the uploaded screen recording as B-roll over the narration, add a lower third for the product name, and use consistent Motion Graphics only when a step needs clarification.For revisions, point to one timeline, time range, caption, or visual and protect everything else: “At 00:31, replace the callout with a two-column comparison. Keep the cut, audio, captions, and all other Motion Graphics unchanged.”
Beyond talking head: what else people build this way
The A-Roll then B-Roll method holds outside the talking-head format. Only the source and the finishing layers change.
- Long-form to short clips. Ask for complete ideas rather than fixed durations, then check that each clip works vertically. See turning long videos into shorts and social media content.
- Short film and narrative work. The A-Roll is picture and performance instead of speech, so selection matters more than filler removal. See AI filmmaking.
- UGC-style product video. A creator take is the A-Roll; product inserts, captions, and on-screen claims are the B-Roll. See the UGC video workflow.
- Advertising. Short, repeatable, and heavily dependent on a consistent visual system, which is where saved Design Styles pay off. See product ads.
- Explainers. Narration carries the logic while Motion Graphics carry the structure. See making an explainer without After Effects.
Talking head remains the best format to learn on, because the transcript gives the edit a structure you can read. The talking-head editing workflow goes deeper on that case.
What ChatGPT still needs you to review
Before publishing, check:
- Meaning and context. Make sure a shorter quote still represents what the speaker intended.
- Pacing. A transcript may read smoothly while the audio feels rushed or a visual cut feels abrupt.
- Caption accuracy. Confirm names, numbers, terminology, punctuation, and readable line breaks.
- Visual emphasis. Remove B-roll, zooms, or Motion Graphics that compete with the point.
- Rights and disclosure. Confirm permission for source footage, logos, music, likenesses, and generated assets.
- The exported file. Play it outside the editor and check picture, audio, captions, start, end, format, and orientation.
Why this workflow exists
Most AI video tools solve exactly one node of the process. A chatbot can tidy a transcript. An image or video model can produce a shot. Separate products handle music, sound effects, and narration. Each is useful, and none of them assembles a video.
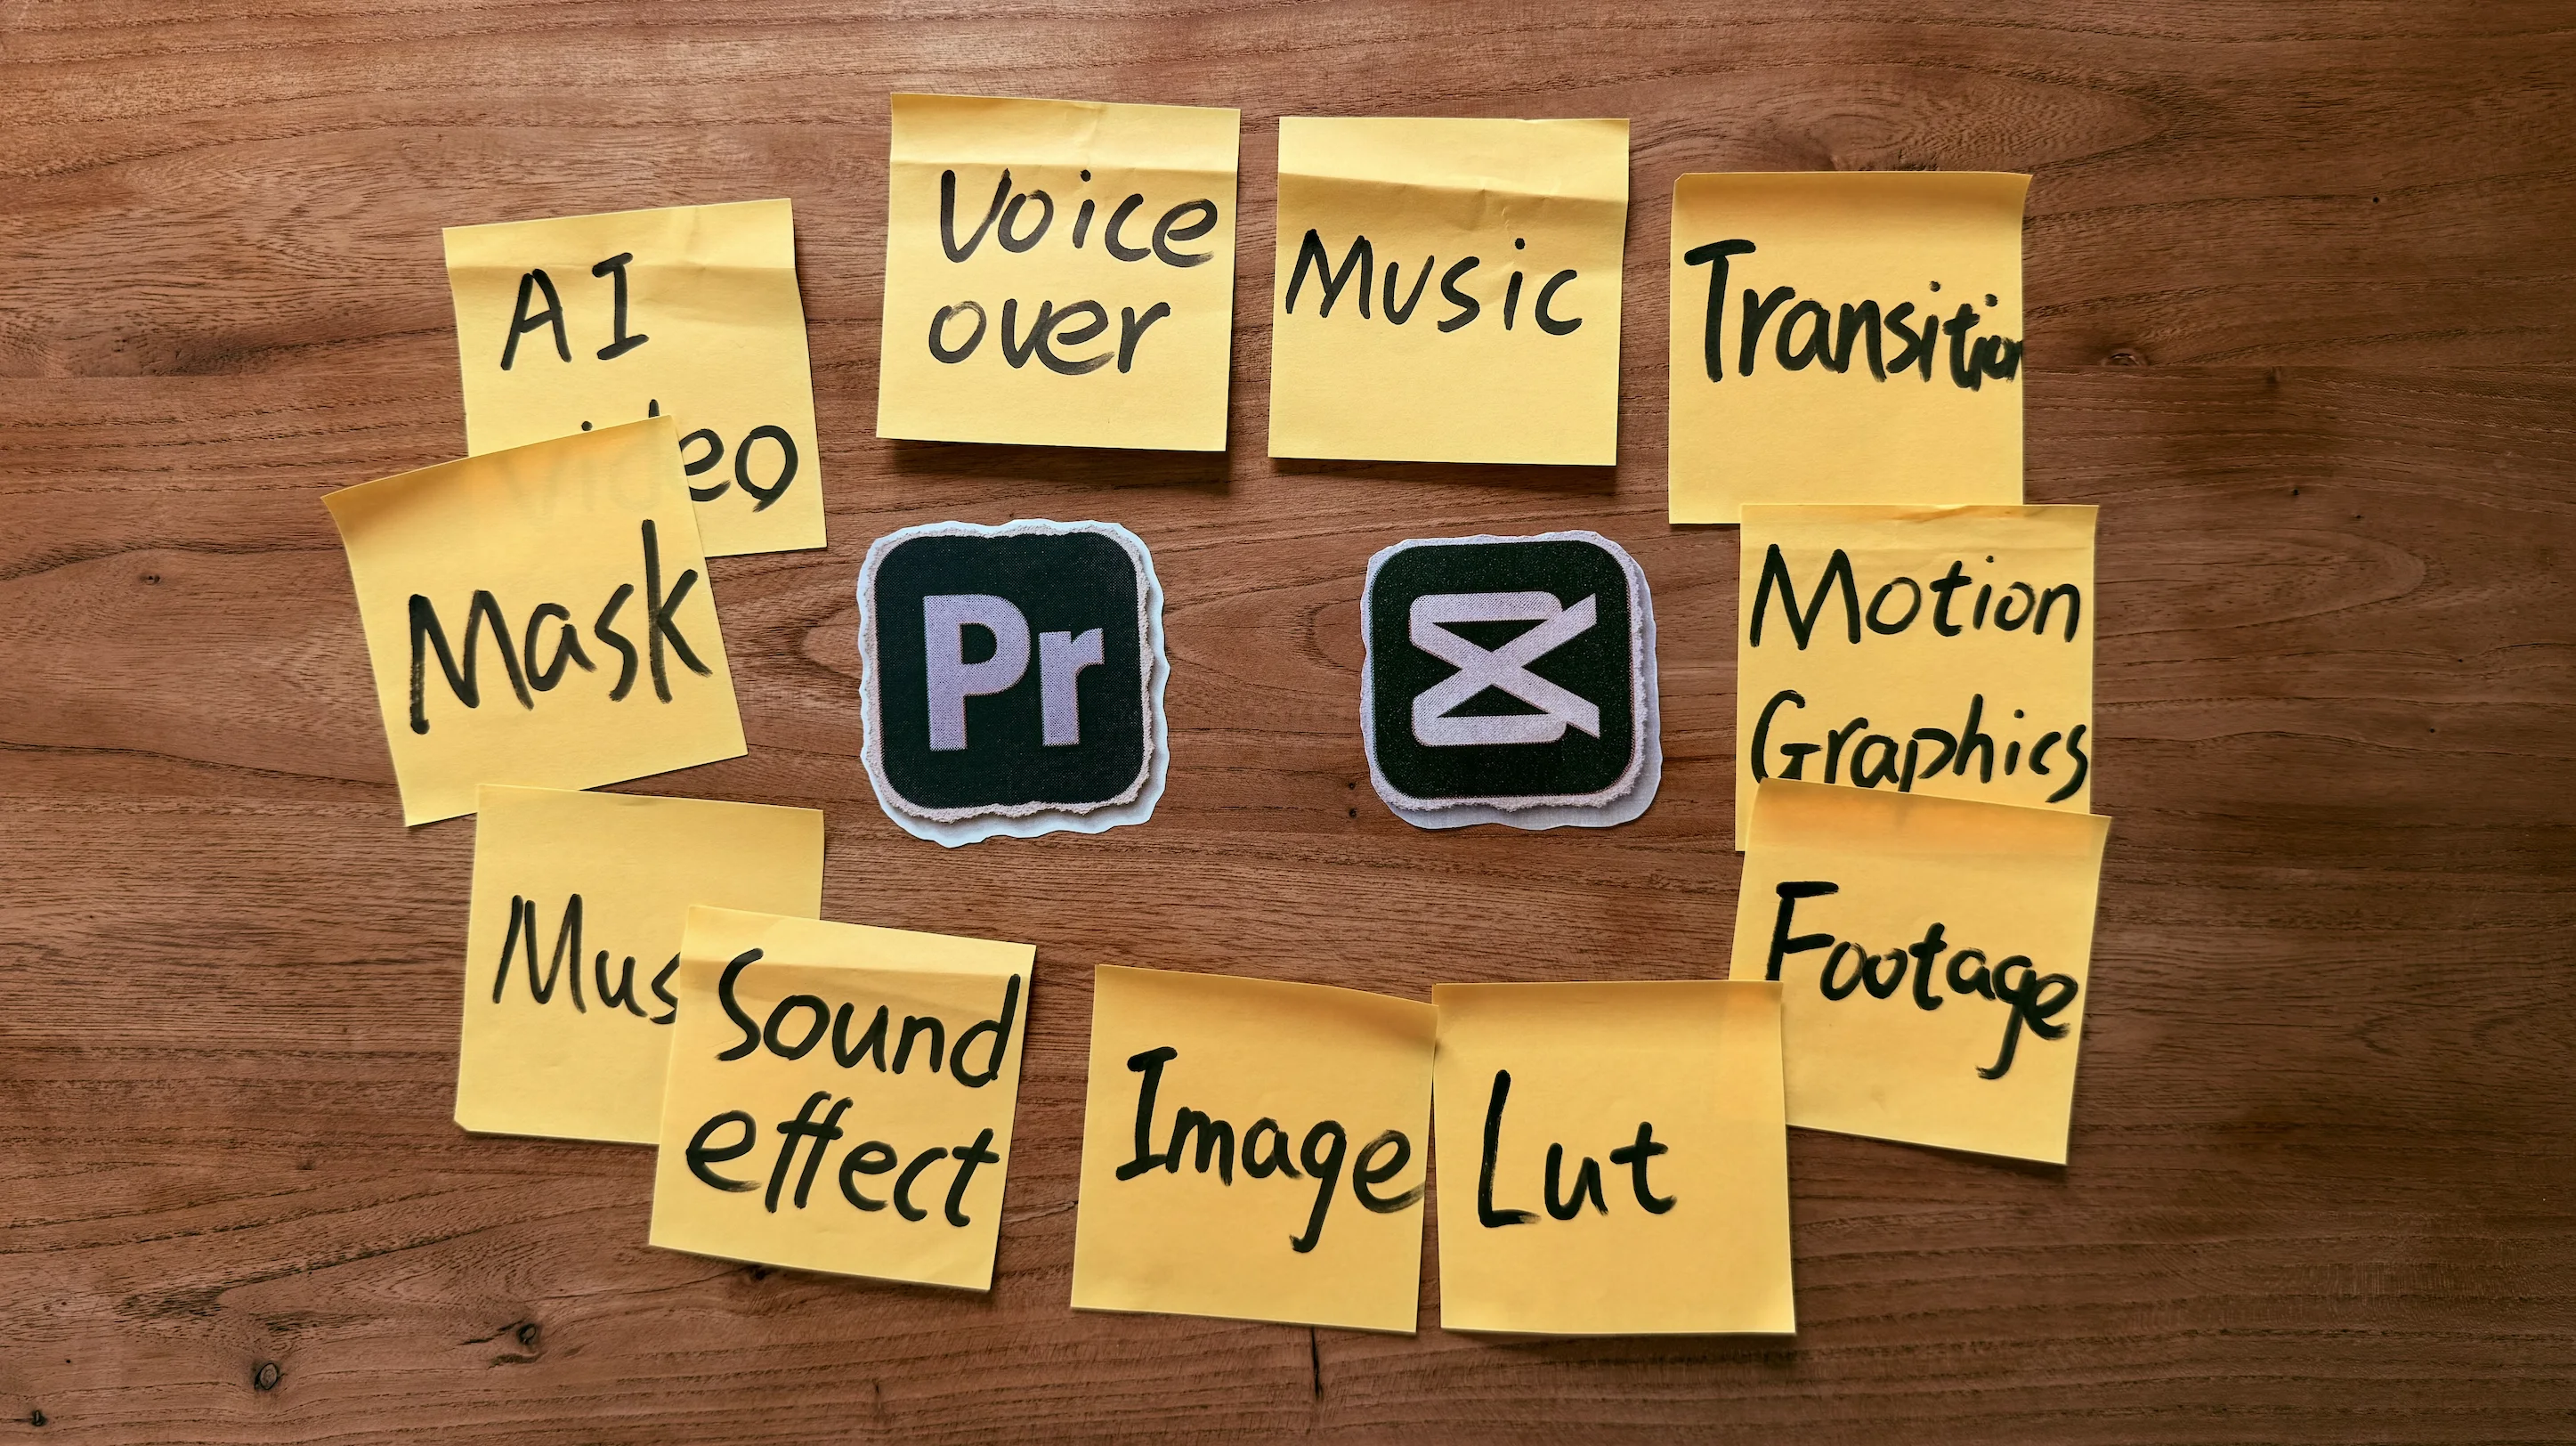
Two problems follow. The more material you create, the heavier the handoffs get, and you end up back in a conventional editor to arrange it all. And a generated asset tends to be a one-shot result: your only connection to it is the prompt that made it, which is a thin and fragile thing to hold. Getting to a passable output is fast; improving that output is where the time goes.
Coding agents changed the second half of that equation in 2026 by taking instructions, running tools, and reporting back. Connecting more generators to an agent, though, does not by itself produce an edit. The outputs still have to land somewhere they can be arranged, retimed, and replaced.
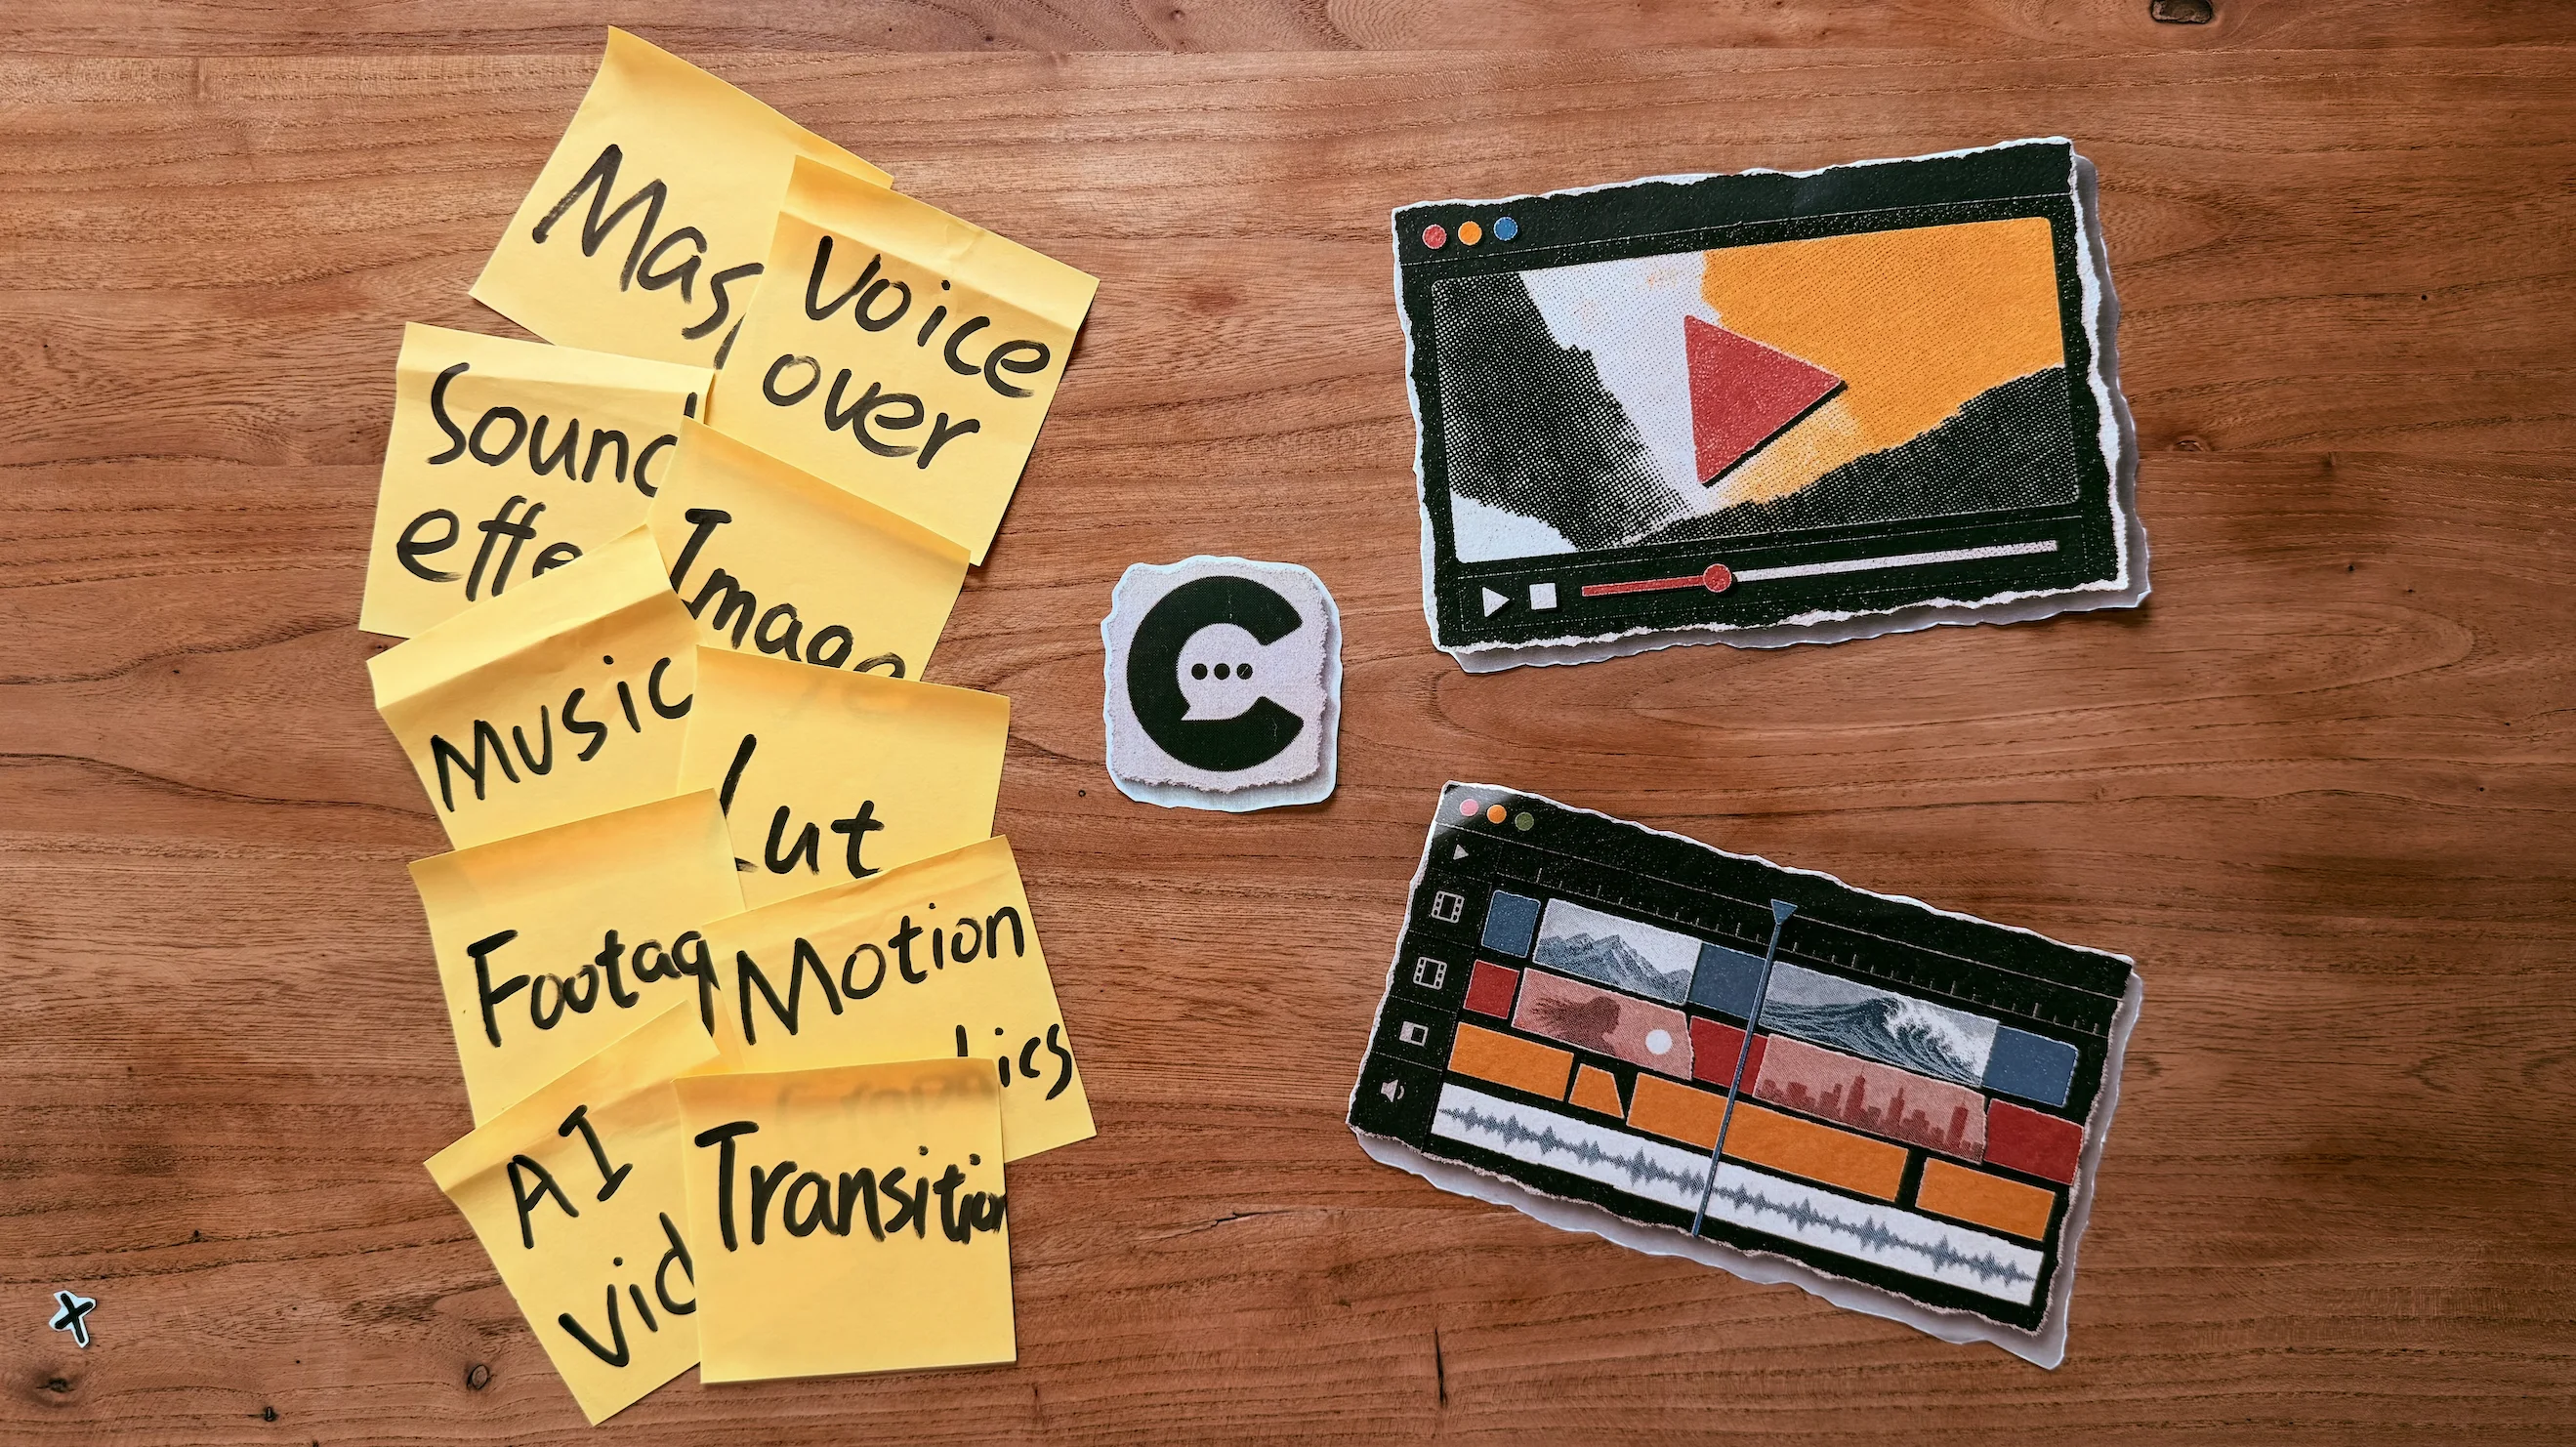
That is the gap ChatCut fills: a real editor, with a timeline, media pool, player, transcript, and property panels, connected to the agent you already talk to.
| Workflow | Best suited to |
|---|---|
| ChatGPT alone | Planning, scripting, transcript reasoning, and edit instructions |
| ChatGPT + ChatCut | Cuts, captions, B-roll, Motion Graphics, audio, and an editable timeline |
| ChatGPT + code-rendering tools | Template-based or data-driven video rendered from code |
A list of suggested timestamps is still a plan. A real edit changes the project and leaves you with a timeline or a finished file.
Troubleshooting ChatGPT video editing
The plugin does not appear after installation
Start a completely new desktop task. Plugin tools are fixed when a task begins, so they cannot appear inside the installation task after the fact. In the new task, type @chatcut to wake the plugin. If it still has no ChatCut tools, confirm that you are using the supported desktop app rather than the website or a remote workspace. Then reinstall by either route: search for ChatCut in the desktop app’s plugin store, or copy the current setup prompt again from ChatCut avatar → Agent Plugin → ChatGPT/Codex.
The editor does not open
Ask ChatGPT to use ChatCut and open the project in its Browser panel. If ChatGPT reports missing tools, return to the installation check above. If an authorization page appears and the project seems stuck behind it, complete sign-in and allow access in that browser view, then continue in the new editing task. Do not paste account passwords, cookies, or access tokens into the conversation.
The desktop app crashes when you add a video
Do not drag video files onto the embedded editor panel. Add media through the conversation column or through My Assets → Upload in the editor. Dragging onto the panel can crash the host app; this is a ChatGPT-side issue rather than a project error, and reopening the task does not change the behavior.
Media upload is unavailable or fails
Open the editor and use My Assets → Upload. Wait until the asset finishes processing before asking ChatGPT to use it. If it fails, confirm that the file plays locally and try a common interchange format such as H.264 MP4 for video, PNG or JPEG for images, or WAV or MP3 for audio. A task attachment is context until you explicitly ask ChatGPT to import and use it.
The first edit is too broad or generic
Narrow the next request. Name the source or timeline, select a time range, state the target length and audience, list what must remain, and describe one change. “Tighten the first 45 seconds but preserve the customer quote and CTA” gives the editor a testable boundary; “make it more engaging” does not.
Export takes time or fails
The Agent Plugin uses cloud rendering, so completion time depends on uploads, network conditions, queue time, output length, and format. Keep the editor open and check progress under the header Export button. If an export stays at Preparing media, let source uploads finish. If it fails, use Retry in the export queue. Repeated failures should be reported with the project name, approximate time, visible error, and export type.
FAQ: editing video with ChatGPT
Can ChatGPT edit videos directly?
Can I upload a video to ChatGPT?
Do I need a video-editing plugin?
Can ChatGPT remove pauses and filler words?
Can it add captions and Motion Graphics?
Can it turn a long video into Shorts, TikToks, or Reels?
Is ChatCut free?
Can I continue editing or export to another editor?
The useful division of labor is simple: let ChatGPT translate your brief into concrete editing work, then use ChatCut’s timeline to judge and refine the result.